Integration Guide
In the previous part, we learned about Using TNC FlipBook with Oxygen Builder. Now, we will explore two different ways to work with Oxygen Builder.
There are two different ways to work with Oxygen Builder.
Method 1: The Regular Way
Method 2: Using Shortcodes
Method 1: The Regular Way
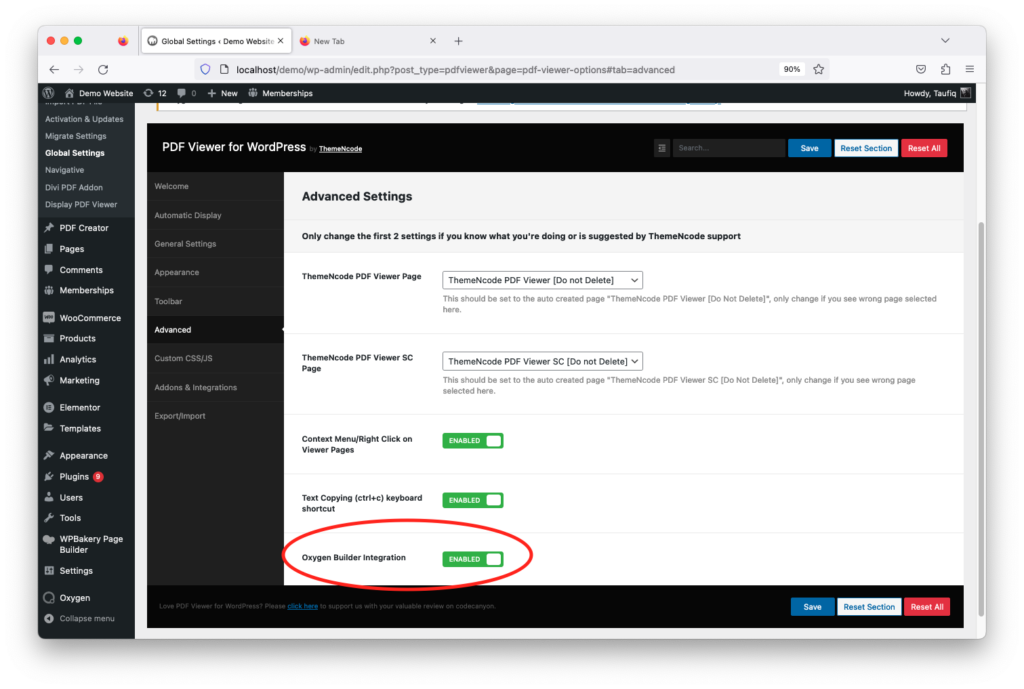
You can now use the default way of creating a FlipBook (PDF viewer > Add New) with Oxygen Builder. To use the integration, you just need to enable the integration of Oxygen Builder from TNC FlipBook > Global Settings > Advanced Tab.
Once you enable Oxygen Builder Integration following the process above, you can start creating a FlipBook from TNC FlipBook > Add New Menu. Once published, you can visit the viewer normally. This is the first method of creating a FlipBook using TNC FlipBook - PDF viewer for WordPress with Oxygen builder.
Method 2: Using Shortcodes
Additionally, you can still use the previous method of inserting shortcodes. Here are the shortcodes you can use.
TNC FlipBook - PDF viewer for WordPress 10.9.0 comes with 2 extra shortcodes to make it compatible with Oxygen Builder or any other builders that get rid of page templates. In this article, you'll get the list of those 2 shortcodes with the parameters. You just need to copy the shortcodes, replace the file URL, and paste them on any of your pages or posts to have the viewer display there.
1. Link X Shortcode
[tnc-x-pdf-viewer-link file="#" target="_parent" download="true" print="true" fullscreen="true" share="true" zoom="true" open="true" pagenav="true" logo="true" find="true" current_view="true" rotate="true" handtool="true" doc_prop="true" toggle_menu="true" toggle_left="true" scroll="true" spread="true" language="en-US" class="test-pdf" text="Open PDF" page="" default_zoom="auto" pagemode="none"]

Parameters
- file: This is where you'll provide the URL to the pdf file that will be opened with FlipBook. Make sure you use the direct URL to the pdf file ending in .pdf, otherwise it will not work. Also, make sure the pdf files are hosted under the same domain.
- class: You can use a custom CSS class for the generated link. Basically, this class is used for styling. For example, if you want the link to be a button and you're using the Bootstrap CSS framework, you can use the following in this field: btn btn-default
- text: This is the text that will appear as a link. Please make sure to fill this field, as it will display nothing on the front end if you keep this field empty.
- target: Link Target, Select how you want the link to open, in the same tab or in a new tab.
- Download: Select if you want to show the Download button in the toolbar.
- print: Select if you want to show the Print button in the toolbar.
- fullscreen: Select if you want to show the Fullscreen button in the toolbar.
- Share: Select if you want to show the Share button in the toolbar.
- Zoom: Select if you want to show the Zoom option in the toolbar.
- open: Select if you want to show the Open button in the toolbar.
- logo: Select if you want to show the Logo button in the toolbar.
- Pagenav: Select if you want to show the Pagenav button in the toolbar.
- Find: Select if you want to show the Find button in the toolbar.
- page: Enter the page number if you want to send the user to a specific page on opening of the file.
- default_zoom: Select the Default Zoom here
- Pagemode: If you select Thumbs as pagemode, the left bar will be opened with page thumbnails, and if you choose bookmarks, the left bar will be opened with the list of bookmarks. It is not recommended to use it as it may not work smoothly on smaller screen sizes. We've added it just because it might be helpful for some users.
- Language: Select the language you want to use
- current_view: Select if you want to show the Current View button in the toolbar.
- rotate: Select if you want to show the Rotate View button in the toolbar.
- handtool: Select if you want to show the Hand Tool button in the toolbar.
- doc_prop: Select if you want to show the Document Properties button in the toolbar.
- toggle_menu: Select if you want to show the Toggle Menu button in the toolbar.
- toggle_left: Select if you want to show the Toggle Left button in the toolbar.
- scroll: Select if you want to show Scroll options in the toolbar.
- spread: Select if you want to show Spread options in the toolbar.
- default_scroll: Default Scroll Method, Use 1 for Vertical scrolling, Use 2 for Horizontal Scrolling, and use 3 for Flip Book
- default_spread: Default Spread Mode, options: 1 for No Spread, 2 for Odd Spreads, 3 for Even Spreads
Output:
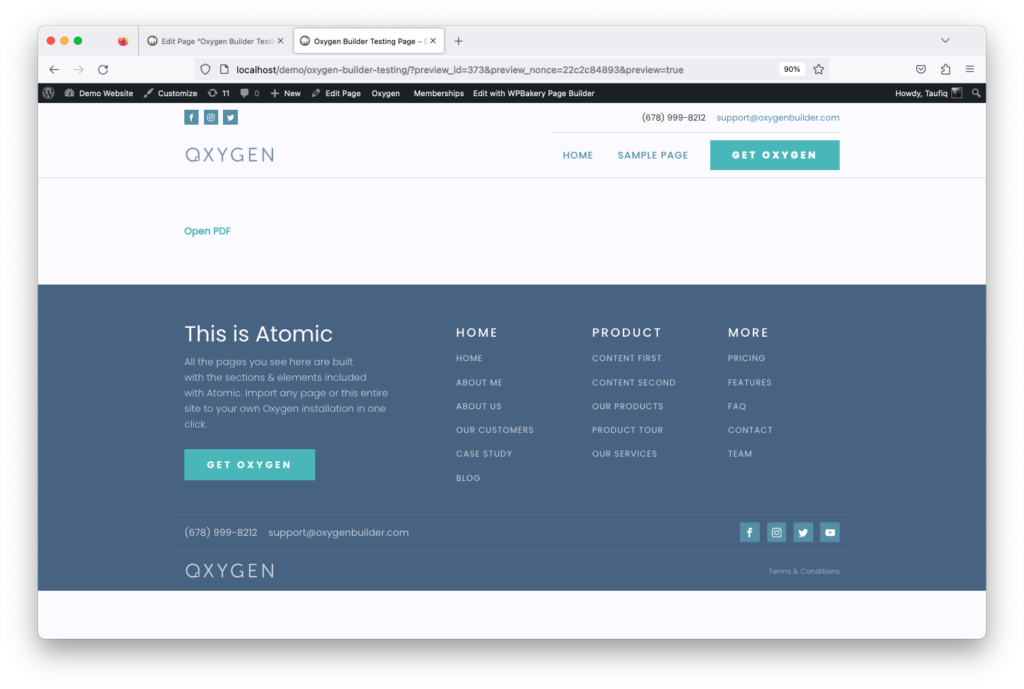
You can see there is a link with the text "Open PDF". When someone clicks the link a PDF file will open. The text can be changed to anything from the shortcode.
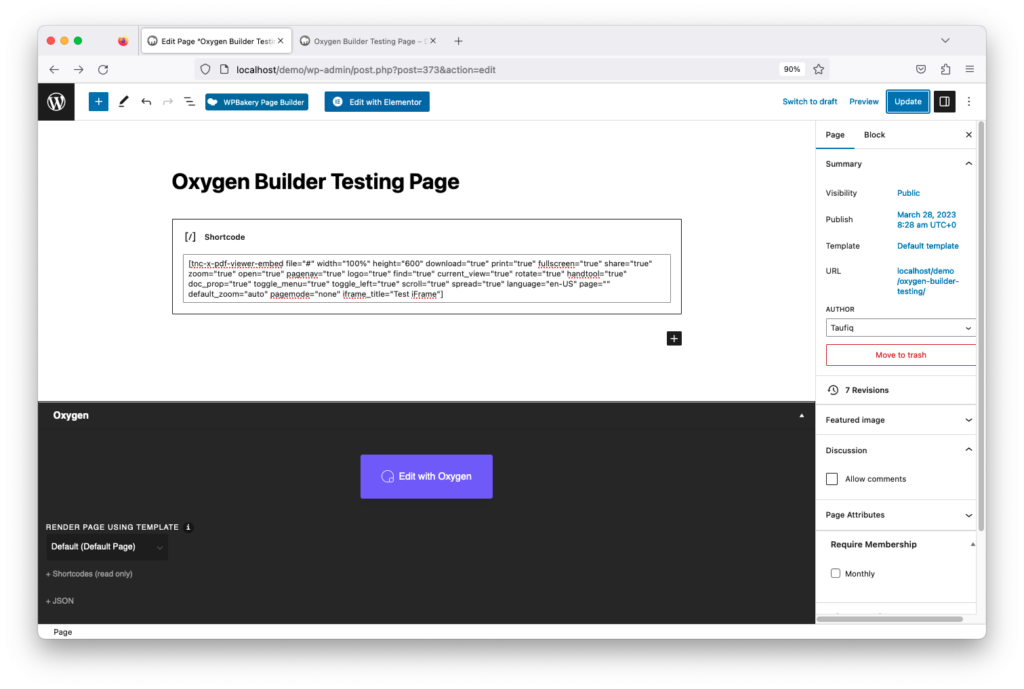
2. Embed X Shortcode
[tnc-x-pdf-viewer-embed file="#" width="100%" height="600" download="true" print="true" fullscreen="true" share="true" zoom="true" open="true" pagenav="true" logo="true" find="true" current_view="true" rotate="true" handtool="true" doc_prop="true" toggle_menu="true" toggle_left="true" scroll="true" spread="true" language="en-US" page="" default_zoom="auto" pagemode="none" iframe_title="Test iFrame"]
Parameters
- file: This is where you'll provide the URL to the PDF file that will be opened with FlipBook. Make sure you use the direct URL to the PDF file ending in .pdf; otherwise, it will not work. Also, make sure the PDF files are hosted under the same domain.
- width: Specify the Width of iFrame in pixels here. For example, you can use 600
- height: Specify the height of iFrame in Pixels here. For Example, you can use 800
- Download: Select if you want to show the Download button in the toolbar.
- print: Select if you want to show the Print button in the toolbar.
- fullscreen: Select if you want to show the Fullscreen button in the toolbar.
- Share: Select if you want to show the Share button in the toolbar.
- Zoom: Select if you want to show the Zoom option in the toolbar.
- open: Select if you want to show the Open button in the toolbar.
- logo: Select if you want to show the Logo button in the toolbar. The logo will not be displayed if the iframe width is small. But it will display when users go to full-screen mode.
- pagenav: Select if you want to show the Pagenav button in the toolbar.
- Find: Select if you want to show the Find button in the toolbar.
- page: Enter the page number if you want to send the user to a specific page on opening of the file.
- default_zoom: Select the Default Zoom here
- pagemode: If you select Thumbs as pagemode, the left bar will be opened with page thumbnails, and if you choose bookmarks, the left bar will be opened with the list of bookmarks. It is not recommended to use it as it may not work smoothly on smaller screen sizes. We've added it just because it might be helpful for some users.
- Language: Select the language you want to use
- current_view: Select if you want to show the Current View button in the toolbar.
- rotate: Select if you want to show the Rotate View button in the toolbar.
- handtool: Select if you want to show the Hand Tool button in the toolbar.
- doc_prop: Select if you want to show the Document Properties button in the toolbar.
- toggle_menu: Select if you want to show the Toggle Menu button in the toolbar.
- toggle_left: Select if you want to show the Toggle Left button in the toolbar.
- scroll: Select if you want to show Scroll options in the toolbar.
- spread: Select if you want to show Spread options in the toolbar.
- iframe_title: Title of the iFrame tag
- default_scroll: Default Scroll Method, Use 1 for Vertical scrolling, Use 2 for Horizontal Scrolling and use 3 for Flip Book
- default_spread: Default Spread Mode, options: 1 for No Spread, 2 for Odd Spreads, 3 for Even Spreads
Output:
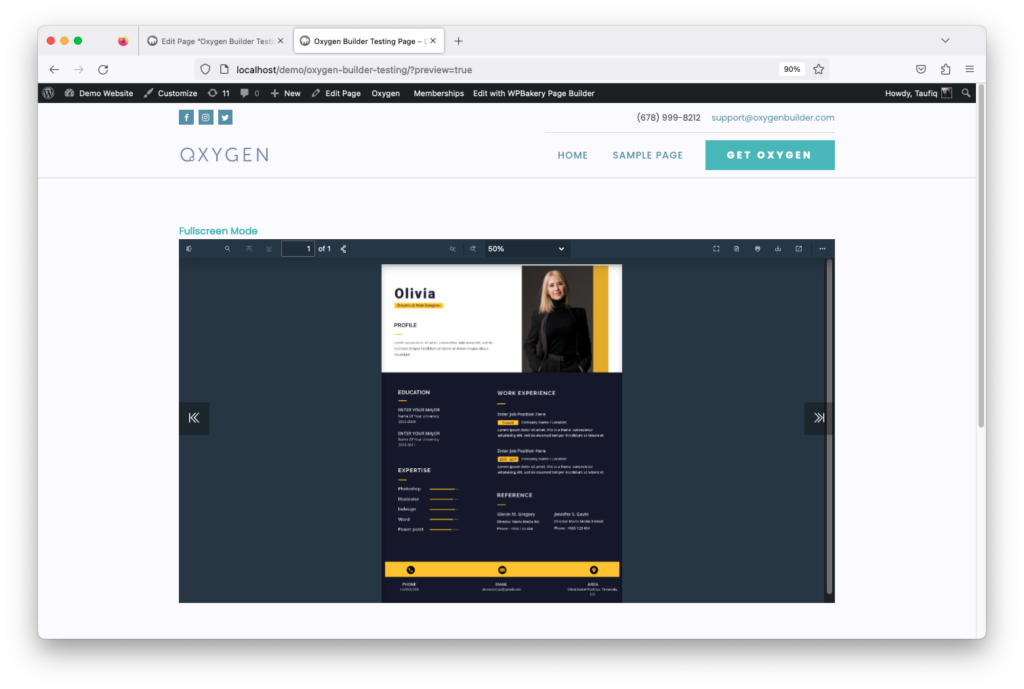
By using this shortcode, one can directly embed and show a PDF file with a FlipBook on a page or post. Change the shortcode as you need, and the viewer will change according to it.
Next: Troubleshooting